Showing posts with label sewing. Show all posts

Monday, February 20, 2012

Sewing For Baby

     I've been busy sewing for baby these last few months. She should be here so soon now and I've started several small projects, thinking each time that I probably won't get it finished in time, but each has taken less than a day and I've been able to not only finish, but to go searching for something else to do. This evening I gave into temptation and finally made a elf hat so that I can try and take my own newborn pictures.


      The tutorial is from Oodles 4 Noodles which I found via Pinterest. Thanks to Pinterest, I now spend way too much time search for new crafting ideas than actually crafting. (I just realized that the first project listed on my Sewing for Baby post, is not in fact a sewing project, I hope the plethora of other projects will make up for it)

     One of my favorite projects so far are the Big Butt Baby Pants. Made by Rae has given me so many ideas! I spent a lot of my birthday money on her patterns (the rest went to Oliver and S.) But she also has some great free patterns (all of which I have downloaded and am in the process of trying out.)


     I have made six or seven of these pants in all of the smaller sizes so that Baby S will have lots of pants to fit over the giant bubble-butt caused by cloth diapers. These two are my favorites. (Other than the cherry print and red linen ones, but I didn't think before doing laundry and forgot to add a color catcher (so helpful when working with new fabric) and the red linen bled all over my white cherry print so that pair is in the re-do box for now.)


     Time to bring out my lovely assistant, the charming pink elephant that my sister-in-law gave Baby S at my shower! She is nameless at the moment, but very eager to help model. This is the Baby Jane Sunbonnet from My Sparkle. I'm really nervous about the sometimes rather harsh sun here in Florida, so I have made two of these and will probably make more. I mean, what cuter way to use two fat quarters while also protecting baby's skin?

    
This afternoon I finally sat down with my copy of Little Things to Sew by Oliver and S. I was worried that everything would be too big or mature for another few years, but I very quickly found a project. Another hat! The husbandman is very proud of me for making something not pink. (It's a big deal, almost everything for this baby is pink. The nursery looks like the weird Pepto Bismol's shabby chic cousin.) I couldn't believe how quickly this one came together. I think I finished it before the husbandman knew I had started it.


      The one project I'm really not quite so sure about is the Swaddle Blanket from Prudent Baby. It is not the project fault, it turned out wonderfully, I just think I made mine too big. My elephant assistant is wrapped in almost a yard of fabric.


     I made one out of a pretty heavy duty flannel (also, not pink, so it can be used again, or heaven forbid, if the ultrasound tech was wrong.) The second is from a very light-weight cotton gingham. We will see which one works better. Maybe one for nights and one for days? I'm still a little clueless about swaddling, as my experience is strictly limited to baby dolls and pink elephants, and my last how-to lesson was from my mom when I was in kindergarten. What do you think? Flannel? Cotton? Plain old square of fabric?


And of course, I made another of Dana's (who just had her own beautiful baby girl!) faux chenille baby blanket. I bought a chenille cutter for this time around, and it made a world of difference. I was able to cut it all in about three hours, which is a huge improvement on the two days my last one took (Alright, I begged, and begged, and the husbandman was kind enough to cut it for me after laughing at my sad lack of strength. (He may have also taken it to keep me from stabbing myself again, which I did manage to do twice.) I found out later that you're supposed to cut out one layer at a time, and not five, which explains a whole lot.)


I love how the rows look up-close!


      I also have several sheets, receiving blankets, burp cloths, and a moby-style wrap sewn, but they just aren't very exciting to photograph, and honestly, they all look the same. I will try and post a nursery post tomorrow though, so I can show off all the work I've done there! Now I just need to figure out some new way to keep busy while I wait for baby to decide to come.

post signature

Thursday, September 15, 2011

Baby Kimono

     The other day the husbandman pointed out that I hadn't posted my latest project. In all honesty, I wasn't sure if I was going to post it at all, its not very "me". But it is one of the husbandman's favorites, so here it is, just for you.


     Yes, those are Florida State colors. I really wanted to keep using the butter yellow that I mentioned in my last post. It really is lovely. And when I saw that I had maroon, (I've just been informed that it is really garnet, sorry) I decided to go for and see if I couldn't pull if off and support the husbandman's team. (I'm a Virginia Tech fan myself, and yes, this causes occasional conflict, but we won last time and that's all that matters)


     The pattern is from on of my favorite books, Weekend Sewing, (which I reviewed here.) This is one of the best sewing books I have ever used, and still wildly recommend it. This pattern came together in a little over an hour, and would have been done much sooner if I had not insisted on using french seams. (I hate exposed seams) I would not recommend using french seams on this pattern though, although all the seams are straight lines, it makes the shoulder seams a little wonky.

     I'm super excited to show you my next project though, and will post pictures as soon as I finish it. I found maroon suede in my hope chest, and have gone to town with it! But then, who can resist suede?

post signature

Thursday, September 8, 2011

Blue Bird

     When I was sorting through the fabric in my hope chest I found this wonderful butter yellow cotton, that I knew I just had to use. Not only is it light weight and soft as anything, it is also gender neutral! (I'm going at little crazy with not knowing as my crafting time creeps by.)

     I wasn't entirely sure what to make with it though, so I put it aside for a few days to think bout it. I was cleaning out the bookmarks on my computer (they tend to go a little crazy if I don't prune them) I re-found this project.
Photo From Spool Sewing
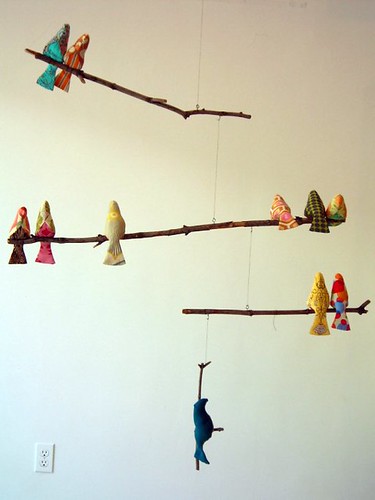
     And I knew exactly what to do with my yellow fabric! Spool Sewing has a wonderful tutorial to make this bird mobile, and I thought that even if I don't use the birds for a Mobile (though I probably will) they would make cute decorations, and even fun toys for an older baby.


     This is my version. This honestly only took me about fifteen minutes, and it only took me that long because I didn't red the directions, and I'm really, really bad at turning things right-side-out with ripping through the seam. I have found that a small zig-zag stitch does help with that though, if anyone else in the same boat.


     I still can't get the head exactly right, but I am working on it, and I will post more pictures as I increase and grow my flock. I would really recommend this project if you only get a few minutes o work at a time, once you get the hang of it, I'm sure you can churn these out in no time. I think this would also be great weighted with a little rice or beans. Or as it just occurred to me, they may also work great as a booboo buddy if made out of flannel and filled with rice or birdseed and then put in the freezer or slightly warmed in the microwave. What do you think?


post signature

Hope Chest


     I wanted to show you one of my greatest treasures today. As a wedding present, my dad made me a hope chest. I, being the odd one that I am, have wanted one for a long, long time. I expected a skillfully made cedar box. I got a treasure chest, far beyond my wildest expectations.


     See how amazing it is? I used to creep out to my dad's wood shop, and peek in it, but even seeing it being created was nothing at all like seeing it finished. I love this flourish in particular, because it reminds me of a similar flourish above my parent's old bed. It just makes me feel safe and happy whenever I see it.

     
     The details alone make it stunning, the chest in it's entirety make it an heirloom. It even has a secret to go with it (but I can't tell here, or else it wouldn't be much of a secret!)


     One of my favorite things about is that it is lined with cedar, which is not only very practical at keeping out bugs and such, but it makes anything that is kept in it smell heavenly! I don't think it will come as much of a surprise to anyone that this is where I keep my fabric. Not only does it keep everything neat, organized, and smelling wonderful, it allows me to set a limit of how much fabric I horde keep. Right now it is almost full, so I am limiting myself to what I already have for my next several projects.


     Do you have a special gift that will last generations? Or one that is not only a gift, but a act of love?

post signature

Wednesday, July 20, 2011

Beach Robe

      As soon as I saw Dana's beach robe, I knew I had to make one for Miss G. So as soon as I could, I ran out to Walmart to buy a towel to chop into pieces and tun into one of these too-cute-for-words robes.  My favorite things about this project? The hood, I think everything should have a hood, and luckily Miss G seems to agree, I also love that the strap is sew down in the back, so it doesn't slide off wiggly bodies.


I also grabbed a pillow case to use for the lining. I lined the hood, the ties, and the sleeves. I already had the bias tape made for another project, so my only worry for that was that I would have enough. I did, but just barely. I could not believe how easily this project came together, I really don't think I spent anymore than three hours making it.


       I also ran out of yellow thread on the last stitch, so I knew it was went to be.


      I was so proud when my dad asked me how I did the stripes on the bottom that I was almost a little disappointed to admit that I didn't do anything at all, I just lined up the pattern piece to use the striping already on the towel...

Tuesday, May 24, 2011

Dress Up Bandanna

     This is one of the many projects that I start as soon as the idea pops into my head.  It was simple enough that I didn't take the time to sketch it out or mull over it. And now looking at the finished result, I'm really not sure if it is nearly as cool as I thought it was. Anyone else have projects like that? I'm still not sure if this is great or stupid, but I'm going to share it with you anyways. 

My old iron leaked something awful, and soaked everything I tried to iron. But I have a new one now!
     

Tuesday, May 10, 2011

Summer Top Tutorial

     Every winter I forget why I complained so bitterly that we don't have a/c. Every spring and summer I am reminded.  This summer I hope to beat the heat by wearing light weight and billowy linens and cottons. One of my favorite summer tops is just a few inches too short (which is very unusably for me, being 5 feet 2 3/4 inches) so I decided to see if I could remake it, just a little longer.  This is the first time I have worked without a paper pattern, so I really wanted to see what y'all thought. Then I thought that since it was easy enough for me to make without a pattern, you could do it too!  So here it is, my Beat the Heat Tank Top.


     This pattern is about as simple as it gets. You can easily make it for any age, and from almost any relatively lightweight fabric. (Unless you want to line it of wear a cami under it, you might want to make sure that it is not so lightweight as to be sheer though) This version is a halter top, but I have anther that that has spaghetti straps, and it could easily have any variation you could think out, or have no straps at all. You’ll need two large rectangles of fabric, mine were 22 inches by 20 inches, two narrow rectangles of fabric, mine were 3 inches by 22 inches, two pieces of elastic, and some ribbon.

Thursday, March 31, 2011

Favorite Nursery Rhymes

     I have been toying with some ideas for my first clothing line.  I am so sad that No Big Dill's month of Once Upon a Thread is coming to an end, and I was thinking on how to use some of the wonderful ideas she came up without copy-catting. Then some little voice inside the chaos of my mind whispers, why not do nursery rhymes? Aha! What a great idea for clothing for little ones! They can be sweet, vintage, clever, and at times, just a little bit over the top.  (The only unfortunate thing about this voice was that it decided to speak to me in the middle of the night and would not be hushed until I finally gave up and wrote it down and sketched it out...)

Images from Google
     My creative side seems to love this idea and has run miles with it! The only problem is that I have run out of nursery rhymes to sketch out and play with!! So I'm asking for your help. What are your favorite nursery rhymes?  I'm going to go sit down with my parent's Mother Goose book illustrated by Tomie dePaola, and my old Beatrix Potter books, but I really want to know which nursery rhymes have stuck with you.  Which one do you tell your children? Which ones just make you smile?


post signature

Wednesday, March 16, 2011

Felt Cupcake Tutorial

     Lately I have been frantically sewing felt cupcakes for my first job, my aunt's Cupcake Challenge.  And since I'm making so many of these, I thought I might go less stir-crazy if I knew someone out there was making them too! And in order for someone (anyone?) to join me, I have to share the inside secrets of how I make them. So... here you go! How to make a felt cupcake to wow your friends, family, or random strangers you meet walking down the street in a little over an hour!

For each cupcake, you will need:
  • A few scraps of felt, (I always look in the remnant bin first, it will be more than enough to make a cupcake, I usually get at least three out of mine)
  • A sewing machine (not necessary, but nice)
  • A needle and thread (the pieces get too small to sew on the machine)
  • Beeswax (again, not necessary, but very, very helpful when hand sewing)
  • A package of piping
  • A button
  • Fiber Fill stuffing
  • Pinking shears and fabric scissors 


                                                      There are three pattern pieces. The
                                                      first is a circle 4.5 inches in diameter.
(I just traced a bowl.) Cut of a wedge from the middle to make it look like Pacman. Then you will need half of an arch, 6in inches at its widest point, three at its narrowest, and about three inches tall. (I cut apart a cupcake liner and then just made it a little taller.)  Then you will need one more
                                                     circle, this one almost 2 inches
                                                     in diameter. Then cut out one of each
                                                     circle and two arches to look like this:


     Fold the big circle in half and sew up the Pacman mouth. This is your top, and sewing the slice up gives it some shape, making it rounded rather than flat.


     It should look like this when you are done, the middle is about two inches higher than the sides.  Don't worry about the seam, it will be covered with the "frosting".

 
     Then sew place both arches together, one on top of the other, and sew the straight sides together. (You could also cut the piece on a fold and then you'd only have to sew one seam (this is how I created the pattern to work, but I forgot when it came time to cut everything out) either way works just fine.)


     It should look like this when you turn it right-side out.  Place to the side, you wont need it quite yet.


     Pick a color piping to use. I don't pin the piping to the cupcake top, but you can if you wish (it might get a little bulky though and hard to sew.  The felt does a great job of holding everything in place, so you really don't need to pin it, but if it makes you feel better, go ahead.) Try and keep about 1/2 to 3/4 of an inch between the first row of piping and the edge of the felt, this makes it much, much easier to sew the top to the body. Sew as close to the piping cord as you can, I like to sew right on top of the manufacturer's stitches, it helps blend the two colors of thread if you can't get an exact match. (This is great chance to use up filled bobbins, no one ever sees the bobbins thread, and it makes no sense to wind new bobbins for such a small amount of sewing)


     When you come back around to the end of the piping, tuck it under the second row and just keep going! (You may have to slow down here, Madeline had a hard time getting over both cords, and needed a helpful tug.)


     Try and keep the second row as close to the piping cord of the first row as you can, the rows tend to gape a little because of the roundness of the top when the cupcake is stuffed.  Sewing the rows flush seems to help keep things looking a lot neater.


     Keep going around until you can't possibly make another row. (This one should have had one more row sewn.) Make sure to sew the edge of the pipping down into the middle of the open area, it will fray and you will want to be able to cover it in the next step.

 
This is what the back looks like (I think it looks neat, excuse the randomness.)


     Then go find a button big enough to cover your open area in the middle of your cupcake, but don't pick one that is so big that it takes over screaming "look at me!"  This is my button jar, I keep it handy, and it is almost always useful.


     Sew down your button. I recently found out that you can sew buttons on with the sewing machine and it changed everything.  Set your sewing machine to a zig-zag stitch, and shorten the distance between your stitches to zero so that the needle just moves back and forth and the feed-dogs do not pull the fabric forward. (It just hit me that you could just turn the feed-dogs off...) Then widen your stitches to the width of the holes in the button.  After several broken needles, I always take care to turn the crank on the side of the machine, rather than using the foot pedal until I know for sure that I have the right width selected.


     Your top is finished! Pin it to the body of the cupcake (the two arches) with the right sides together.  I found that I can sew these two pieces on Madeline if I go very slowly, carefully, and if I have left a decent gap between the pipping and the edge of the felt. I like to use a small zig-zag stitch rather than a straight stitch (it somehow seems more secure.)  Doing it by hand may be easier, its up to you.  Here are some of my tips for hand-sewing.


     Turn the cupcake right side out.  This is the hardest part.  Luckily felt can take some tugging and pushing.


     Go ahead and stuff your cupcake.  I like mine to be a little under-filled so that they are still soft and squishy, but really its however you think looks best. You will have to hand-sew the rest, the bottom is just too small for the machine, it really doesn't take much time and just giving up and hand-sewing it saves a lot of headaches and frustrations.  I like to use a blanket stitch to get everything really neat and tight.


     You will see this seam, but if you work neatly enough it wont matter, and it will be hidden by the cupcake liner anyways so it really doesn't matter.


Ta-Da! Your cupcake is done!! See, that wasn't so bad!


     Now onto the liner/paper/holder (whatever you want to call it.) Cut out one small circle and two more arches out of any color felt that pleases you, maybe match it to the icing or the button. (I did neither, I just like pink.) Use pinking shears (if you have them) to cut out the long arch, to make it look more like the pleated liners. Sew the two arches together, just like you did for the body of the cupcake.


    Sew on the bottom (by hand again) but you can sew it to the inside of the liner so that you hide the seam when you turn the liner right-side-out and slide in your cupcake. Put the cupcake inside the liner, and you're done!! That's it.  I found that this type of "icing" was by far the most popular, but let me know if you want to know how I made the other two types and I'll whip up another tutorial.


     As a side note, I have a question for all of you amazing readers. What kind of posts would you like to see more of? Do you look forward to the tutorials like this one? Do you crave the stories? Or are you just in it for the photography (although that's unlikely, my photography skills need a lot of work, I really want to take a class this summer.)  How can I hep give you what you're looking for?

                                                                                                                                  I linked to:


post signature